
Recently my website was unavailable because there was an issue with the permalinks. So the links on the homepage wouldn’t refer to a blog post. That was *** annoying, so I created an Azure monitor that checks if the website is up and the response (HTTP 200 has the correct value). That makes it possible to see if the webpage you are testing has the correct response (content-wise) to the HTTP GET request.
So if you have a web app or website that you want to monitor for availability and performance, you can use Azure Monitor Application Insights to set up recurring tests that send web requests to your application from different locations worldwide. In this blog post, I will show you how to create and configure a Standard test, which is a type of availability test that checks the availability of a website by sending a single request.
A Standard test can also verify the SSL certificate validity, proactive lifetime check, HTTP request verb, custom headers, and custom data associated with your HTTP request. You can also set up alerts to notify you if your application is not responding or responds too slowly.
To create a Standard test, you must have an Application Insights resource in your Azure subscription. If you don’t have one, you can create one by following the steps in this article: https://learn.microsoft.com/EN-us/azure/azure-monitor/app/create-new-resource.
If you don’t have an applications Insight resource navigate to monitor, select applications and click create.

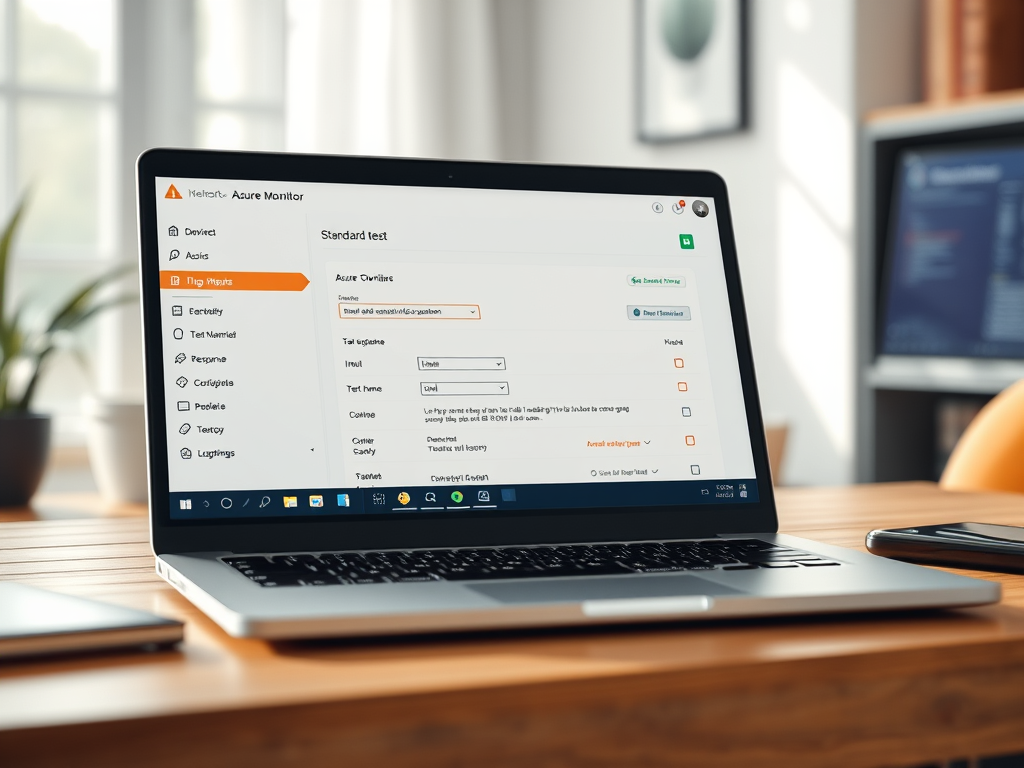
Fill in the required details:

Then click review and create and wait for the resource to be deployed:
Once you have an Application Insights resource, follow these steps to create a Standard test:
Go to your Application Insights resource, select the Availability pane, and select Add Standard test.

Input your test name, URL, and other settings that are described in this article: https://learn.microsoft.com/EN-us/azure/azure-monitor/app/availability-standard-tests. For information this is the info I put in.

To make it really shiny, make sure the content is checked, and it should give back a part of the information on the page. This helps to verify if the content of the site is visible.

then select Create.
After a few minutes, you can see your test results in the Availability pane. You can switch between Line and Scatter Plot views to visualize the test results. The Line view shows the availability percentage and average response time over time. The Scatter Plot view shows samples of the test results that have diagnostic test-step detail in them.
You can also drill down into individual test results to see more details, such as the request and response headers, content, and duration. You can also see the error message and code if the test failed.
To set up alerts for your availability test, follow these steps:
- Go to your Application Insights resource and select Alerts > Manage alert rules > New alert rule.
- Select your Application Insights resource as the scope.
- Select Add condition and choose Availability Test Results as the signal name.
- Configure the alert logic, such as the threshold, evaluation frequency, and severity.
- Select Add action group and create or select an existing action group that defines how you want to be notified when the alert is triggered.
- Give your alert rule a name and description and select Create alert rule.
You can also use other types of availability tests, such as Custom TrackAvailability tests or Classic tests (URL ping tests and Multi-step web tests), depending on your scenario and requirements. You can learn more about them in this article: https://learn.microsoft.com/EN-us/azure/azure-monitor/app/availability-overview
I hope this blog post helped you understand how to monitor web app availability on Microsoft Azure using Application Insights. If you have any questions or feedback, please let me know.