
Microsoft advices to use Teamviewer as the tool for remote assistance when using Azure Intune for managing endpoint devices. The setup process is fairly simple and you can use a trial subscription from Teamviewer for testing. I created this post to show you how to configure this but as Microsoft constantly updates/changes features in Intune this post might be outdated.
Setting up the teamviewer trial
Go to the teamviewer site (https://www.teamviewer.com), on the top right corner of the site click on login. Click on register for a new account and fill in the required fields verify your not a robot and click register. You’ll receive an activation mail on the emailaccount you used at registeration. After activation you can log in on the teamviewer management portal.
Setting up Azure Intune for Teamviewer
Log on to the Azure portal. Remember that to configure these settings the admin account you use must also have an Intune license! If the Admin doesn’t have a license configuration will fail when connecting Intune and Teamviewer.
In the Azure Portal (https://portal.azure.com) go to Microsoft Intune > Devices > TeamViewer Connector
Click on Connect

Read the connector permissions and click OK

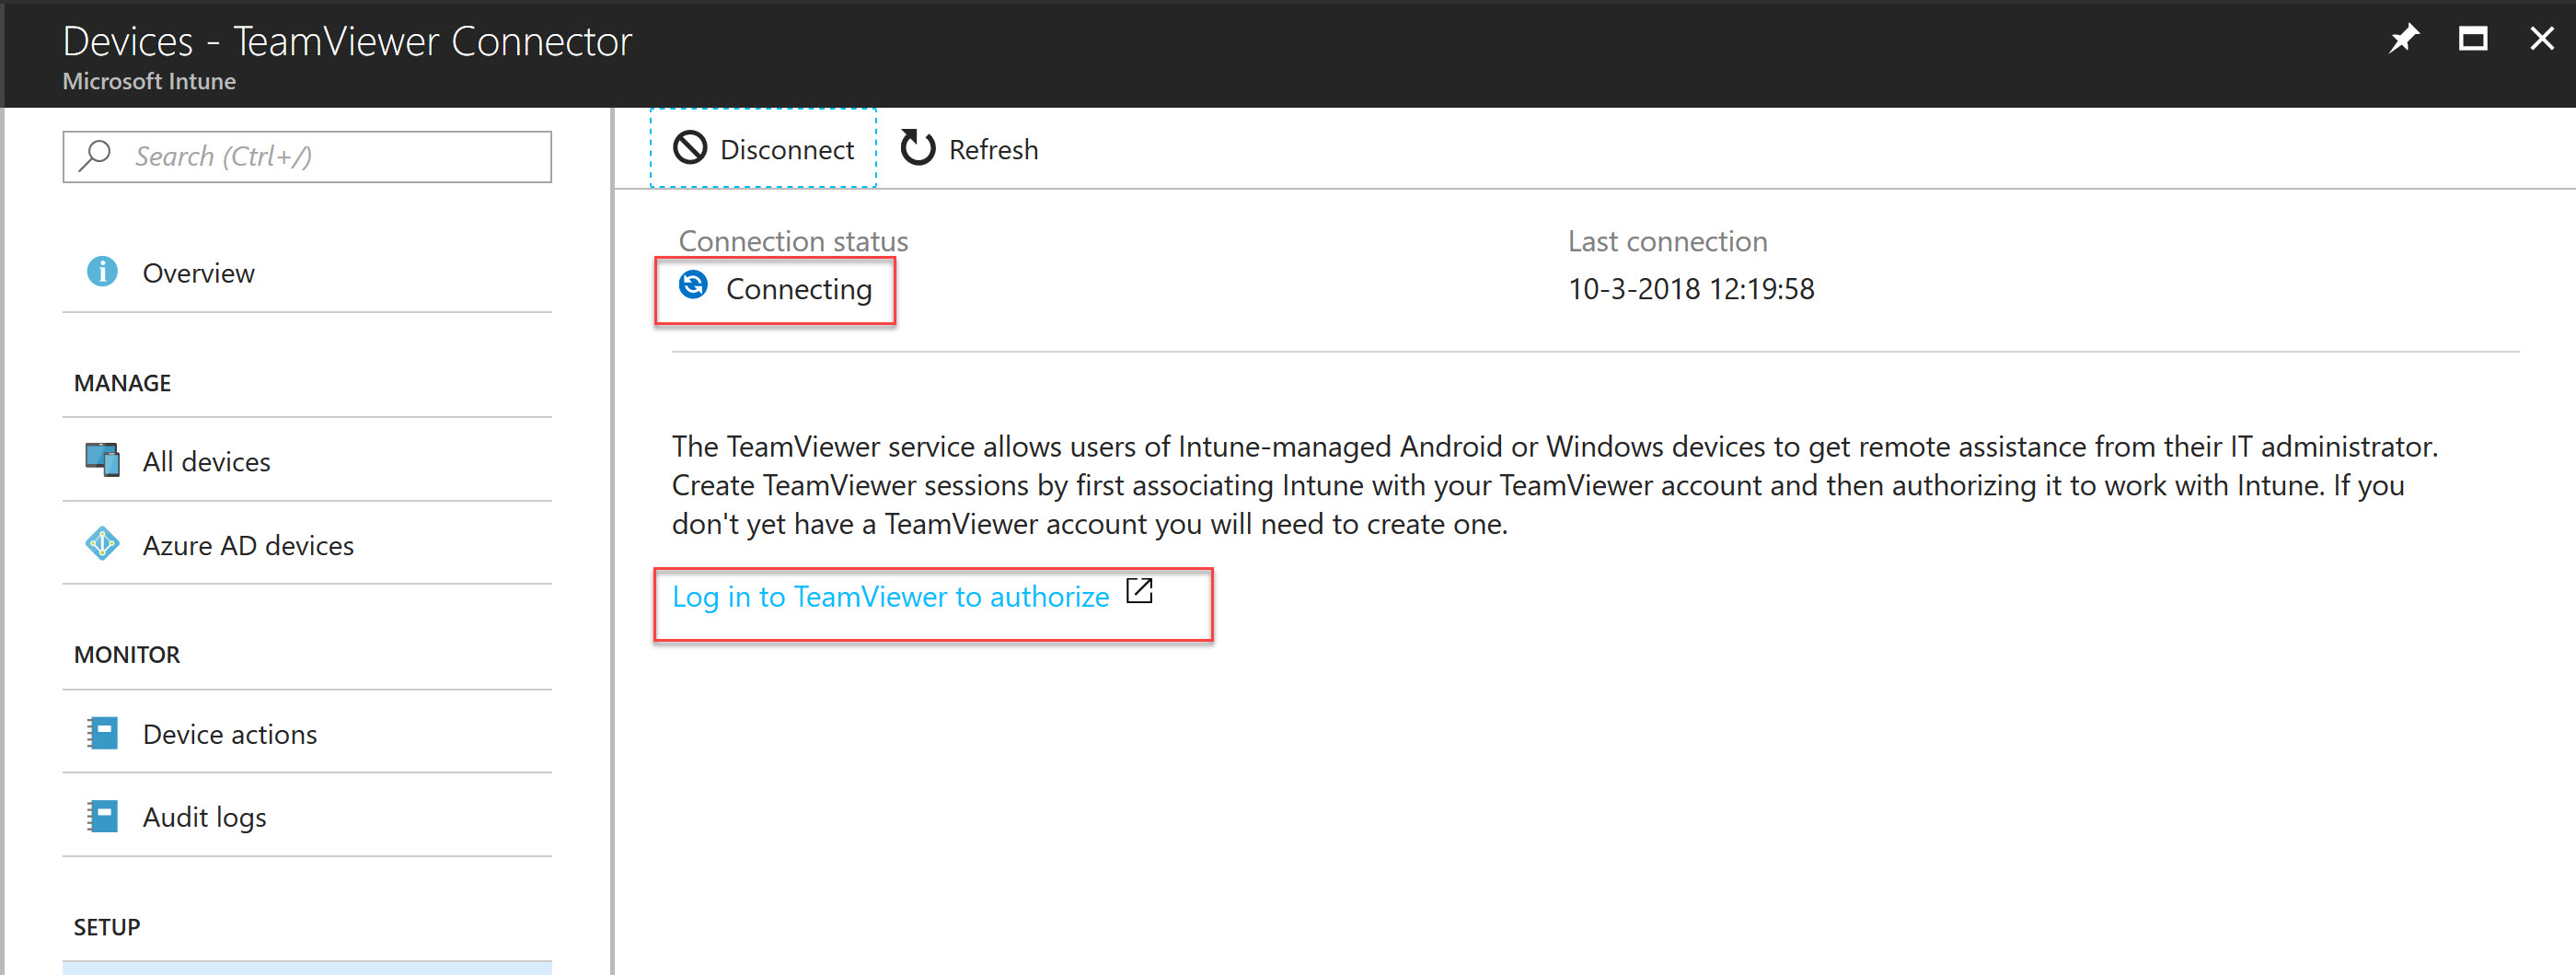
After clicking OK you can see the status of the connector has changed to connecting. Click on the log in to Teamviewer to authorize button.
You are now redirected to the teamviewer login page. Log in with the credentials you created earlier.
(Screenshots from Teamviewer are in Dutch as for some reason i cannot switch this to English)

When logging on you can receive an error stating that the computer used to loging cannot be validated as a trusted computer.
This happens when you create the teamviewer account with another computer/browser than the one you use for the authentication.
This can be resolved by adding the computer/browser to the trusted devices (you’ll receive an activation email for this).
After logging on you get a warning:

In short it states that Intune is authorized to connect to teamviewer and that all is well :-). Click on Allow to continue.
You are then redirected to your Azure tenant and after confirming your identity you get this screen informing you the authorisation is succesful

When you look at your Intune portal you can see that the connection is working, if it still says connecting click on the refresh button.
Configuring remote control
For the intune admins to shadow Windows users, the users must have the Microsoft company portal installed.
By default you cannot force install windows store apps from Intune (to this date). You can only make it available in the company portal (that needs to be installed to show the portal, so there’s a twist there :-)).
When you create a new Windows app (windows store) you can fill in all the required items

But when you select the groups that can use the app you can only select make available for enrolled devices.

But since we are lazy admins we want to automate the installation. luckely there is another way to fix this.
Force installation company portal
On Windows, installation of the Company Portal can be automated via Business Store which is capable of pushing applications from the Public Store! We can use this to silently push any modern app from the public storeto the end-user’s AAD joined or Domain Join + AAD registration Windows 10 device. End-users won’t even need an Microsoft Account (MSA) to obtain the application.
You configure this as follows:
Browse to http://microsoft.com/business-store and logon with an administrative user in your tenant.
Select settings and navigate to Management

Select search for free and paid products

search for Company portal in the search box and select Company portal

select download

Accept the EULA and click continue

After accepting the EULA you get a thank you for your order screen, you can click Close.

Upon returning to the microsoft store screen click on Settings and choose distribution.

Scroll down to management tools and select activate on the Microsoft Intune line.
(You can also active the microsoft autodeployment rule this i also did for testing but is not nescessary for the deployment of the company portal)

After clicking activate you can see both are activated and you can deactivate if nescessary.

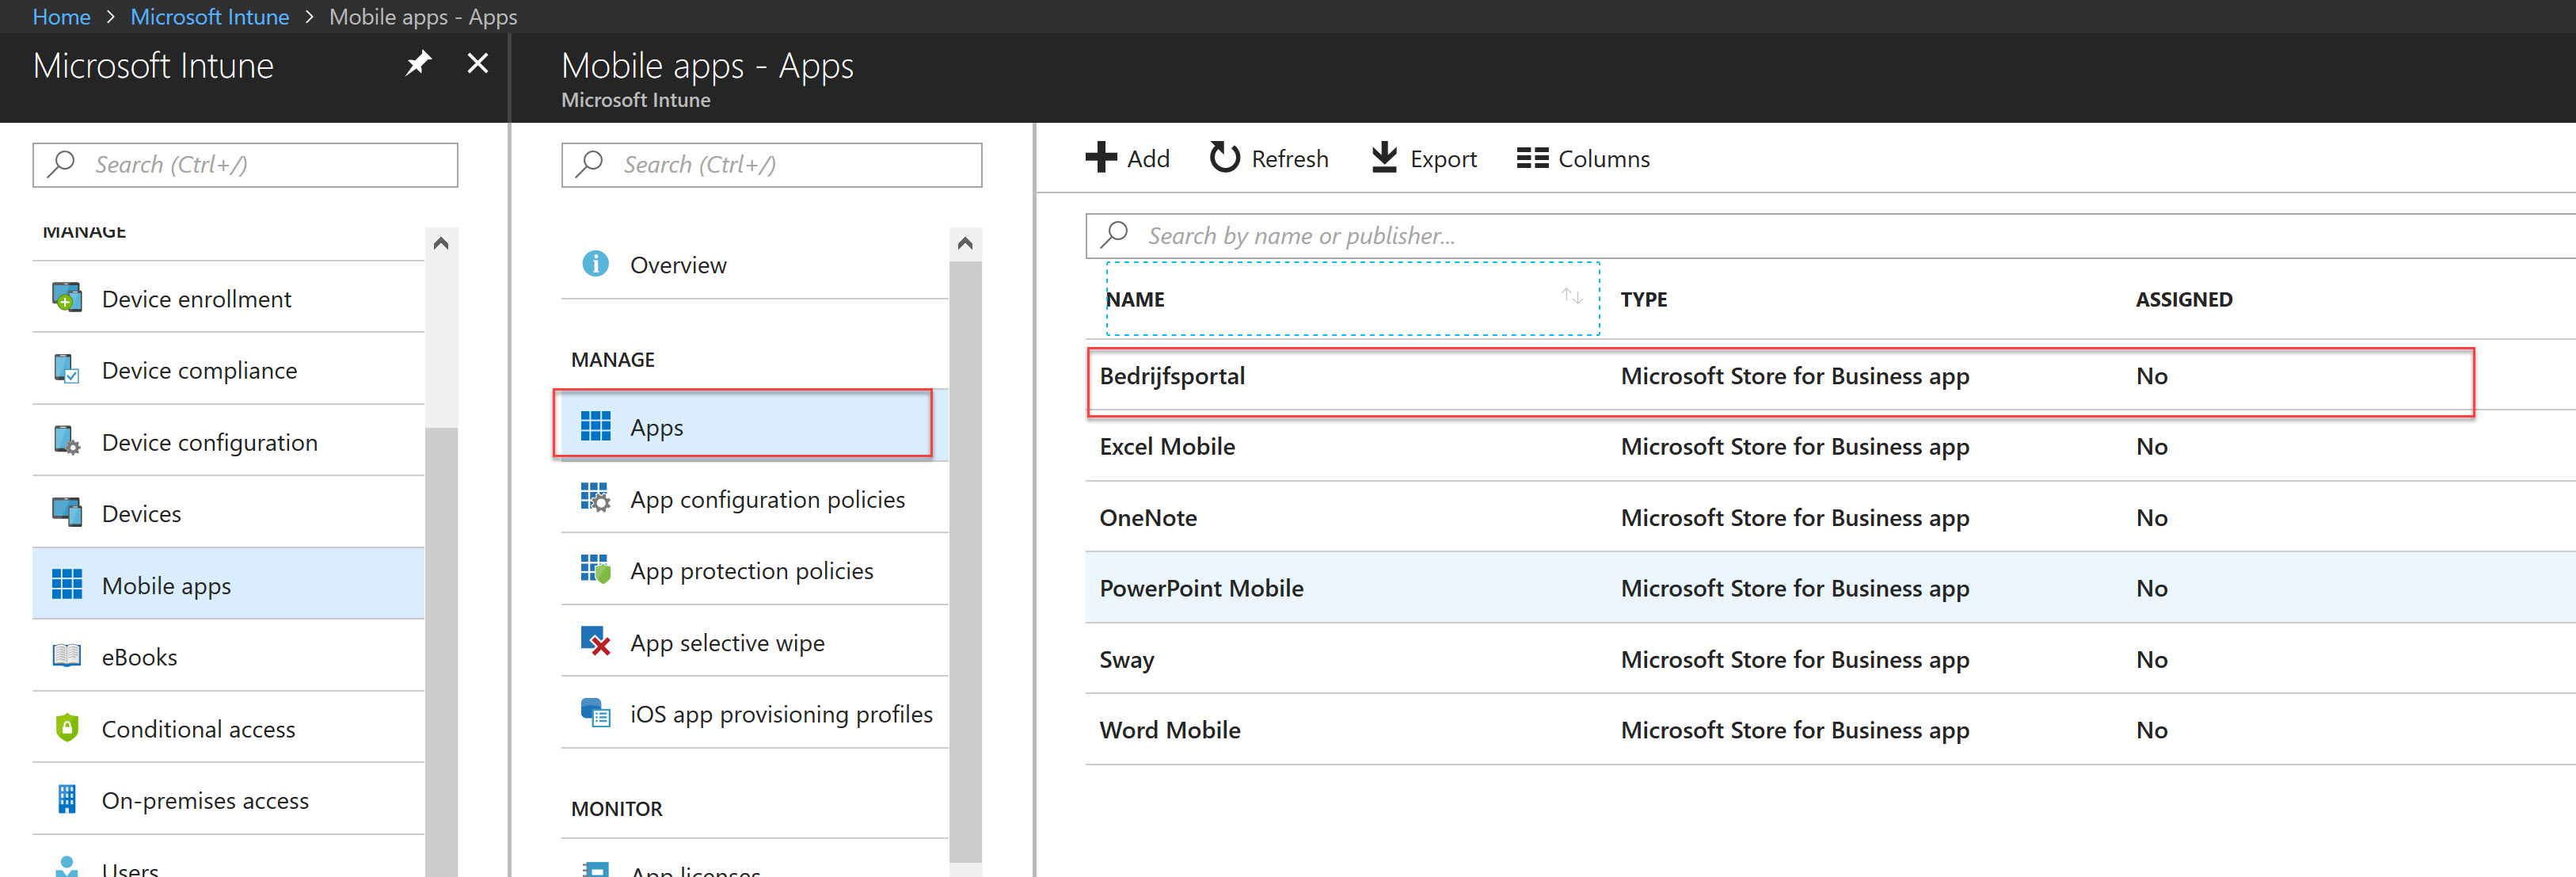
Head back over to the Intune portal. Select Mobile Apps -> Microsoft store for Business.
Select activate choose the language you prefer and select Sync
This Sync can take a while.

After completing the sync head over to the apps menu. You can see the public store apps are now populated into the apps portal.
Select the company portal (or any other store app you want to silently push to the windows devices).
Choose Assignments and select required. Then choose deploy to all devices

Check the settings and click save.

The company portal is now automatically pushed to all Windows 10 endpoints. you can wait a while or manually sync the endpoints via the settings menu.
Finally remote control
After the sync is succeeded and the company portal app is installed, it’s time to remote control the endpoint.
Browse to deevies and select the device you want to control.

Select the device, click on the more button and select New Remote Assistance Session.

After a few seconds the Start Remote Assistance button wil appear.

When you click the button, you are redirected to the Teamviewer page and Quicksupport is downloaded.


Start the quicksupport tool after download.

On the endpoint start the company portal and you’ll find that there is a flag begging for attention. When you click it a message appears stating that your IT administrator is requesting control of your device for a remote assistance session. Click on this message.

On the endpoint the teamviewer site is opened and Quicksupport is downloaded. When you run it on the endpoint the remote session is automatically initiated.

So it takes a bit of configuration but it’s a nice addition to Intune. Hope this helps someone.